Understanding the Basics of Managed Properties for SharePoint Online
SharePoint Online search is an important feature that enhances your ability to find the right information on your company intranet. Managed properties provide relevant data points to help you find the information you seek. SharePoint does this by crawling your content using source or metadata information from the site.
Managed Properties refines search, which is vital to help users receive better search results. Refined searches can be performed only on managed properties.
SharePoint Managed Properties:
Managed Properties include a list of text keywords and metadata (markup language) to enhance the quality of your search.
Crawl the properties to extract the data from the content and metadata and use it in the search index. You can then map these crawled properties with managed properties to improve the accuracy of your search results.
How to Add, Edit, and Delete Managed Property list:
SharePoint Online has two ways to manage the property list through the search schema: in the admin section or the site collection settings.
- Admin Section: You must need to log in with Admin credentials to utilize this option. You can create a new managed property at the tenant level by navigating to search schema in the SharePoint admin portal -> Search -> Manage Search Schema -> New Managed Property.
- Site Collection: Go to the site collection.
You will need to follow the below steps for both above options:
Create “New Managed Property”
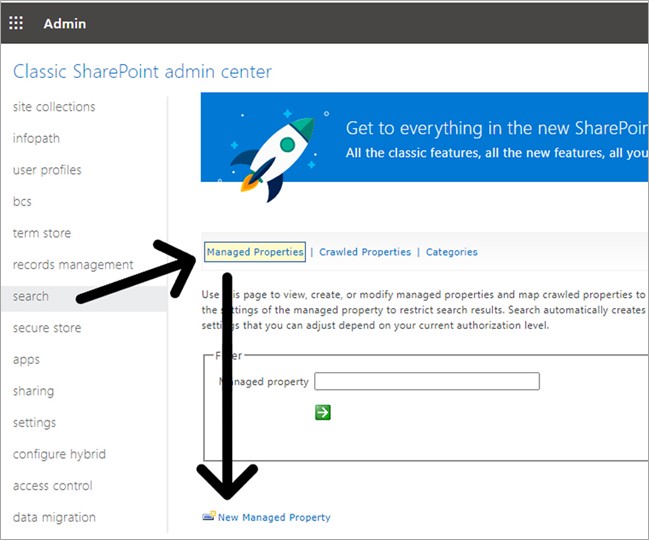
Step 1: Go to Search > Managed Properties > New Managed Properties
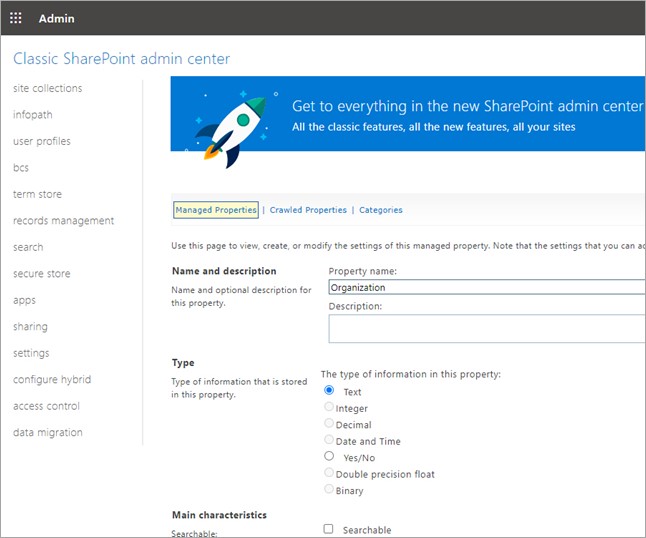
Step 2: Fill in Managed Property attributes and save by clicking the Ok button.
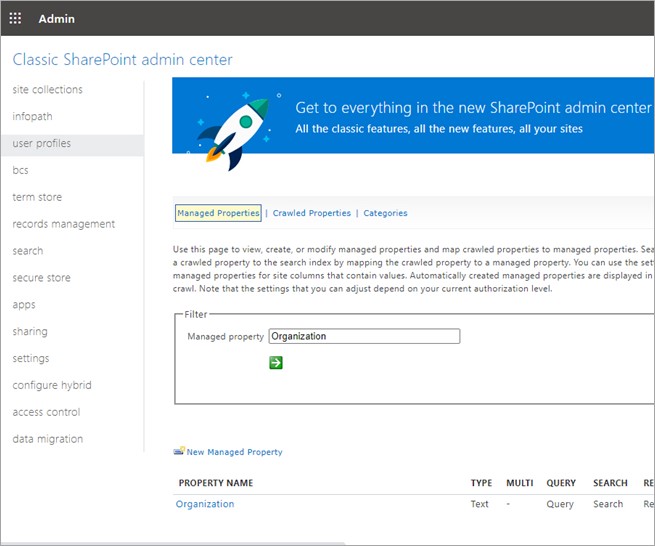
After saving the attributes, the Managed Property is created.
Edit Managed Property
Step 1: Right-click on the Managed Properties, then click on the Edit/Map Property
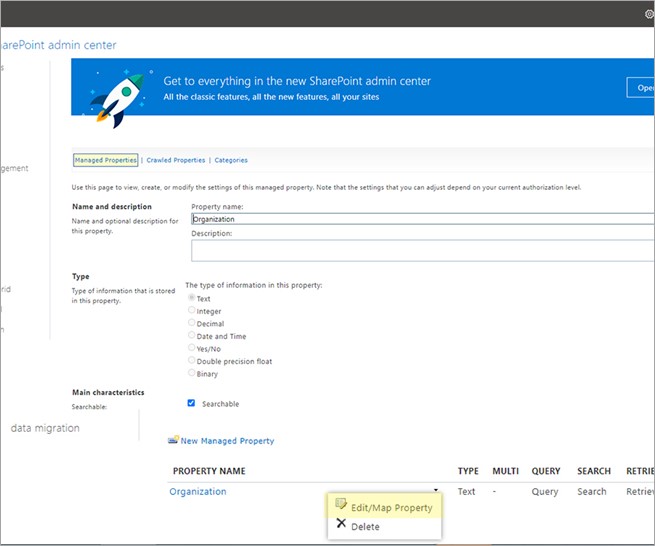
Step 2: Edit the attributes and click on Ok button to save the changes.

Delete Managed Property
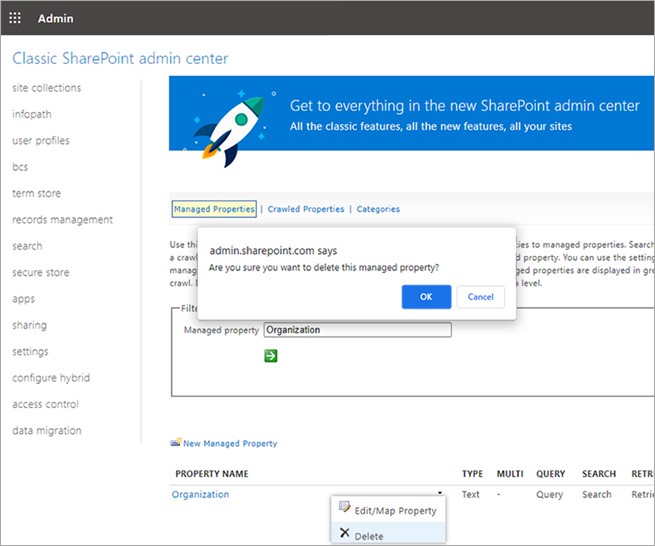
Step 1: Right-click the property menu > click delete > click ok to confirm deletion.
Mapping Managed property with crawled property:
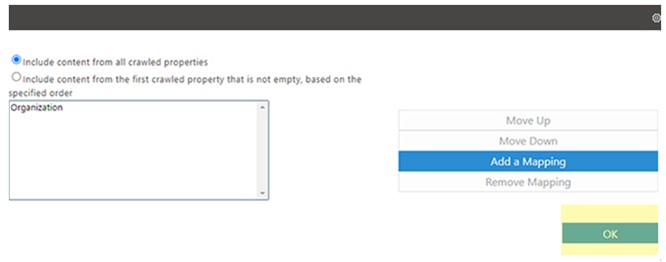
While creating/editing the managed property, you can map the crawled property with the managed property using Add a Mapping button (Either you can use existing crawled property or first create crawled property and then use it in add mapping)
Step 1: Right-click on the Managed property, then click on the Edit/Map Property
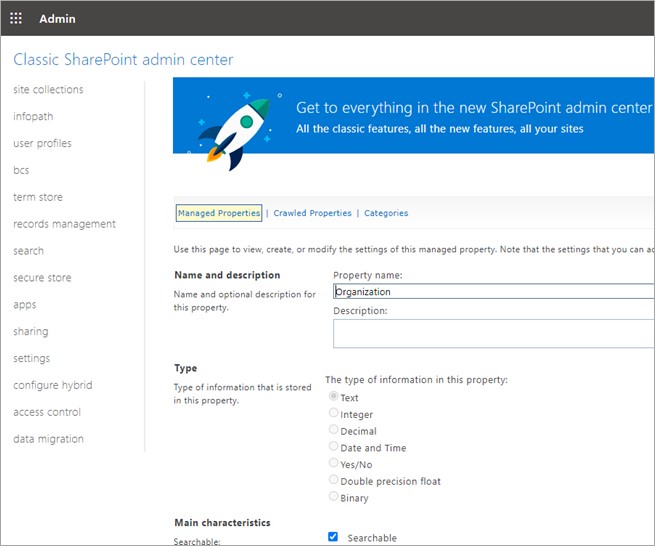
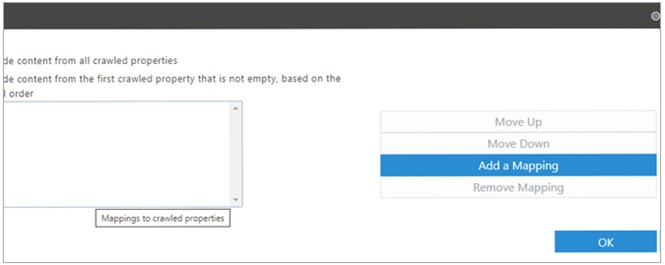
Step 2: Click on Add a Mapping
Step 3: Select crawled property that needs to be mapped.
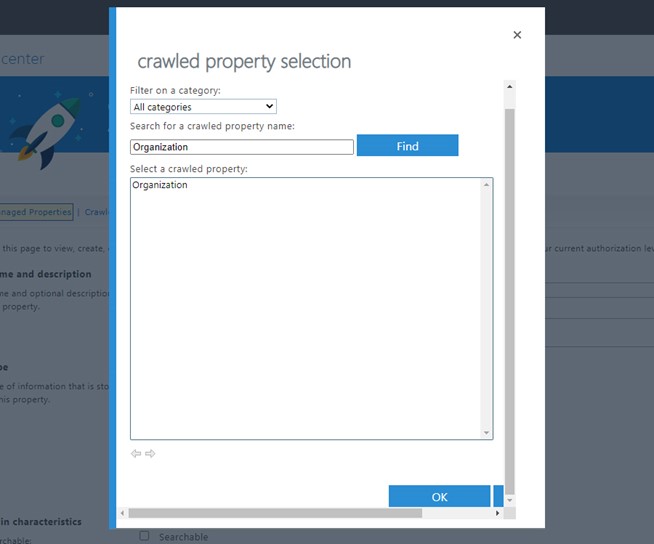
Step 4: Click on the OK button to map.
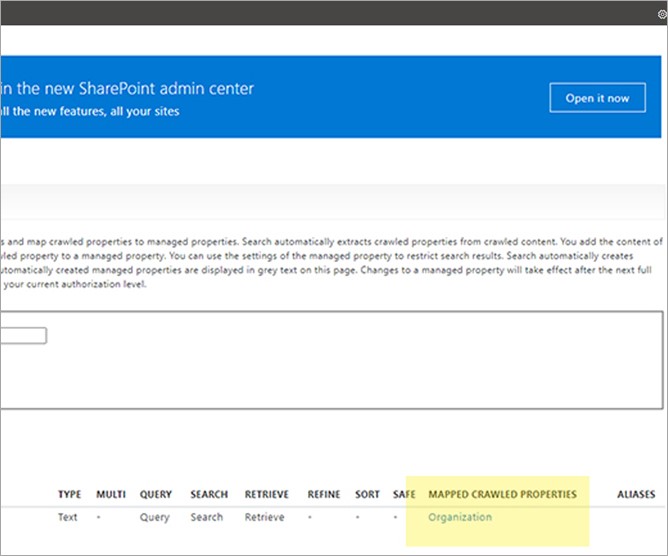
The below image shows the mapped crawled properties.
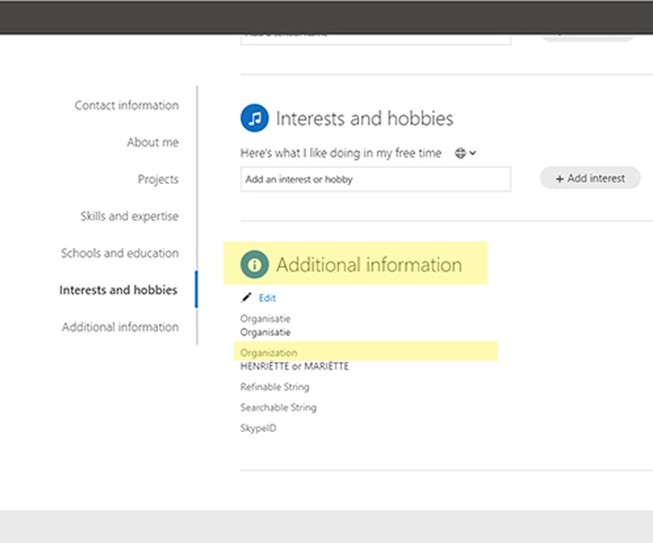
Managed Property in User Profile Search and displaying it in User Delve Profile
Using a managed property in search APIs, you can create a searchable user profile property that you can display on Delve as well.
How to add a new User Profile Property?
Go to SharePoint Admin > User Profiles > Manage Users Properties > New Property.
For displaying on the Delve profiles, you need to configure the basic settings below:
- Default Privacy Setting should be set to “Everyone” for this property to be visible for everyone
- Check “Show in the Profile Properties section of the user’s profile page”
- For displaying this new property on the Edit details page, check “Show on the Edit Details page”
- If you want the property to appear in the search results, the “Indexed” property needs to be “Checked.”
After creating the property, you must check the field is crawled.
In SharePoint Online, crawling is an automated process, but to ensure crawling you need to add corresponding property values in at least one user profile. The crawling process can take anywhere between 15 mins to six hours.
After successfully crawling the property, go to SharePoint Admin > Search > Manage Search Schema > Crawled Properties. Your new managed property should now be displayed.
Once new properties start to display in crawl properties, map it to a managed property via the following steps:
Go to SharePoint Admin > Search > Manage Search Schema > Managed Properties.
Create a new Managed Properties with the following settings:
- Type as “Text”
- Check “Searchable”
- Check “Queryable”
- Check “Retrievable”
- In Advanced Searchable Settings, select “PeopleIdx” in the popup window.
- Click “Add a Mapping”.
Then you are done. Now you need to wait for spiders to crawl your SharePoint site, until new managed properties are displayed. This crawling can take anywhere between 15 mins to 6 hours.
Once the steps above are completed, you have a custom user property you can use to search your entire Office 365 ecosystem to find people, Delve profiles, and search APIs of the user profile.
Conclusion:
In this SharePoint Online search article, we learned more about SharePoint managed properties, how to create a new managed property in SharePoint search at the tenant level, and how to view, edit, and delete the existing managed properties.
If you have any additional questions about how to use managed properties to help your organization get the most out of SharePoint, please reach out to us for a free SharePoint consultation.


